Thursday, April 11, 2013

DIY tooth powder


We have been using tooth powder for more than 6 months now and I have been dying to share the recipe. I wanted to wait until the kids went to see the dentist and see how their teeth checked out. They went to their dentist today and she was amazed at how good their teeth were. Gushing compliments over their pearly whites. I felt able to finally share this with you all! 
First of all,  why tooth powder? Well,  we don't like to use toiletries that have unnecessary chemicals in them. Funny,  but when our kids used the standard toothpastes with flouride they had bad problems with decay. Bad enough that our one son had to be put under general anesthesia at the hospital and have several extensive repairs totalling more in medical bills than we paid for his birth! 
     I began using the EWG skin deep cosmetic database to find products with better ratings to help minimize the risks associated with all the things we put in and on our bodies. We switched to Tom's of Maine toothpaste (good rating) ,  but we felt we could make less waste with making our own. Further research showed us that sodium lauryl sulfate can cause canker sores,  which we all seem to get. Also, glycerin leaves a coating on your teeth which can prevent remineralizing of the teeth. Tom's of Maine contains both of those ingredients. 
Armed with this new info,  I set out to find a sanitary,  healthy alternative to commercial toothpaste. I feel tooth powder in a shakeable container is best for us. It doesn't get contaminated by the family sharing it,  so there is less waste. We tried a few recipes,  but this is the only one the kids would use. We all seem to like it and we had a good dental checkup after half a year of use,  so I think we have a winner! 
The first time you try this,  you need to keep an open mind,  especially if you have been using a foamy toothpaste from a major brand. This will be much different. Seeing brown spit when you rinse may seem counterintuitive when you are trying to make your teeth cleaner,  not dirtier. However,  we have found that our smiles are much whiter now. We use an electric toothbrush,  but I'm not sure this matters with this tooth powder or not. 
I keep the tooth powder in an oil/vinegar cruet. I widened the hole on top with an awl. It is great because I can see how much we have left and the small hole on top helps keep us from wasting the powder. 
Here is our current recipe:


Tooth Powder 

4 tbsp. baking soda
3 tbsp bentonite clay
1/2 tbsp ground stevia (the herb, not the white powder in grocery stores)
1/2 tbsp myrrh gum powder
20 drops of spearmint oil
10 drops of peppermint oil

To use this, just wet your toothbrush, then pour a little powder on it and brush as usual!

Once again, great places to look for ingredients are amazon, mountain rose herbs, and bulk apothecary.


Saturday, April 6, 2013

Catching up

Here's what we have been up to lately... 

Hitting the road
off for a field trip to see Uncle Adam perform Kid Scripts. 

Ninja poses with Adam

Wolfie's trademarked thespian pose. 


 Deliciousness


Hyacinths from my husband. They smell like Heaven. 

I have officially perfected my hamburger bun making skills. These are scrumptious. 

A very weird hedgehog snack of peanut butter and pretzels. Looks like a pinterest fail! 


April Fools! 


We toilet papered the boy's room while they were sleeping. 
Joke's on me! When Vlad said, "I can't believe you're wasting paper!" I gathered up the tp and shelved it. Now it all falls on me whenever I need a piece. 


*NOT REAL POOP*
I tore up the toilet paper tube,  wet it and squeezed it into shape. Highly believable and totally fooled the Hoffbros! I put it on the steps and my son-in-love stepped right over it. He doesn't suffer fools. 


Easter


On Easter,  a combo of springishness: my only blooming crocus,  forced - to- bloom forsythia branches and a doily masterpiece made by my Mom. 

Eggcellent dyeing by the guys! 

Vladdie loved dyeing the eggs. He did not want anyone to eat his eggs though!


Out and about 


 Visiting Grandpa Jay at his art show

A cold day for walking,  but so nice to be outside. 

Thursday, April 4, 2013

DIY lipstick! Finally!


Glorious. 
I finally made some lipstick. It has a dark look in the container (reminds me of Dr. Pepper in color) ,  but it is more subtle on. I like that it is similar to a lip stain. 
Here is my very sweet daughter modeling it for me. Just enough color to wake up the face,  but not look too made up. Of course,  you can control the color level,  so you can barely tint it or go all out. I used alkanet root powder from mountain rose herbs,  but hibiscus powder could be used for a slightly different shade. 


This is beautifully easy,  just place the ingredients in a microwave safe bowl (I use a pyrex measuring cup) and melt,  mix and pour into whatever container your heart desires. 

1 part beeswax 
1 part cocoa butter 
2 parts coconut oil
Alkanet root powder to color intensity level you desire


The great thing is,  if you find that it is too light,  remelt and add more powder.  Too dark? Remelt and add more of the wax/butter/oil. If it is too soft for your container (ie. If using a tube applicator) then remelt and add more beeswax. So easy! I will tell you that you will probably need to add more alkanet than you think,  as it will not look as dark on you as it does in the container. 

This will also work as a shiny,  dewy blush. It just gets better and better. Oh,  I love D. I. Y.! 


Wednesday, April 3, 2013

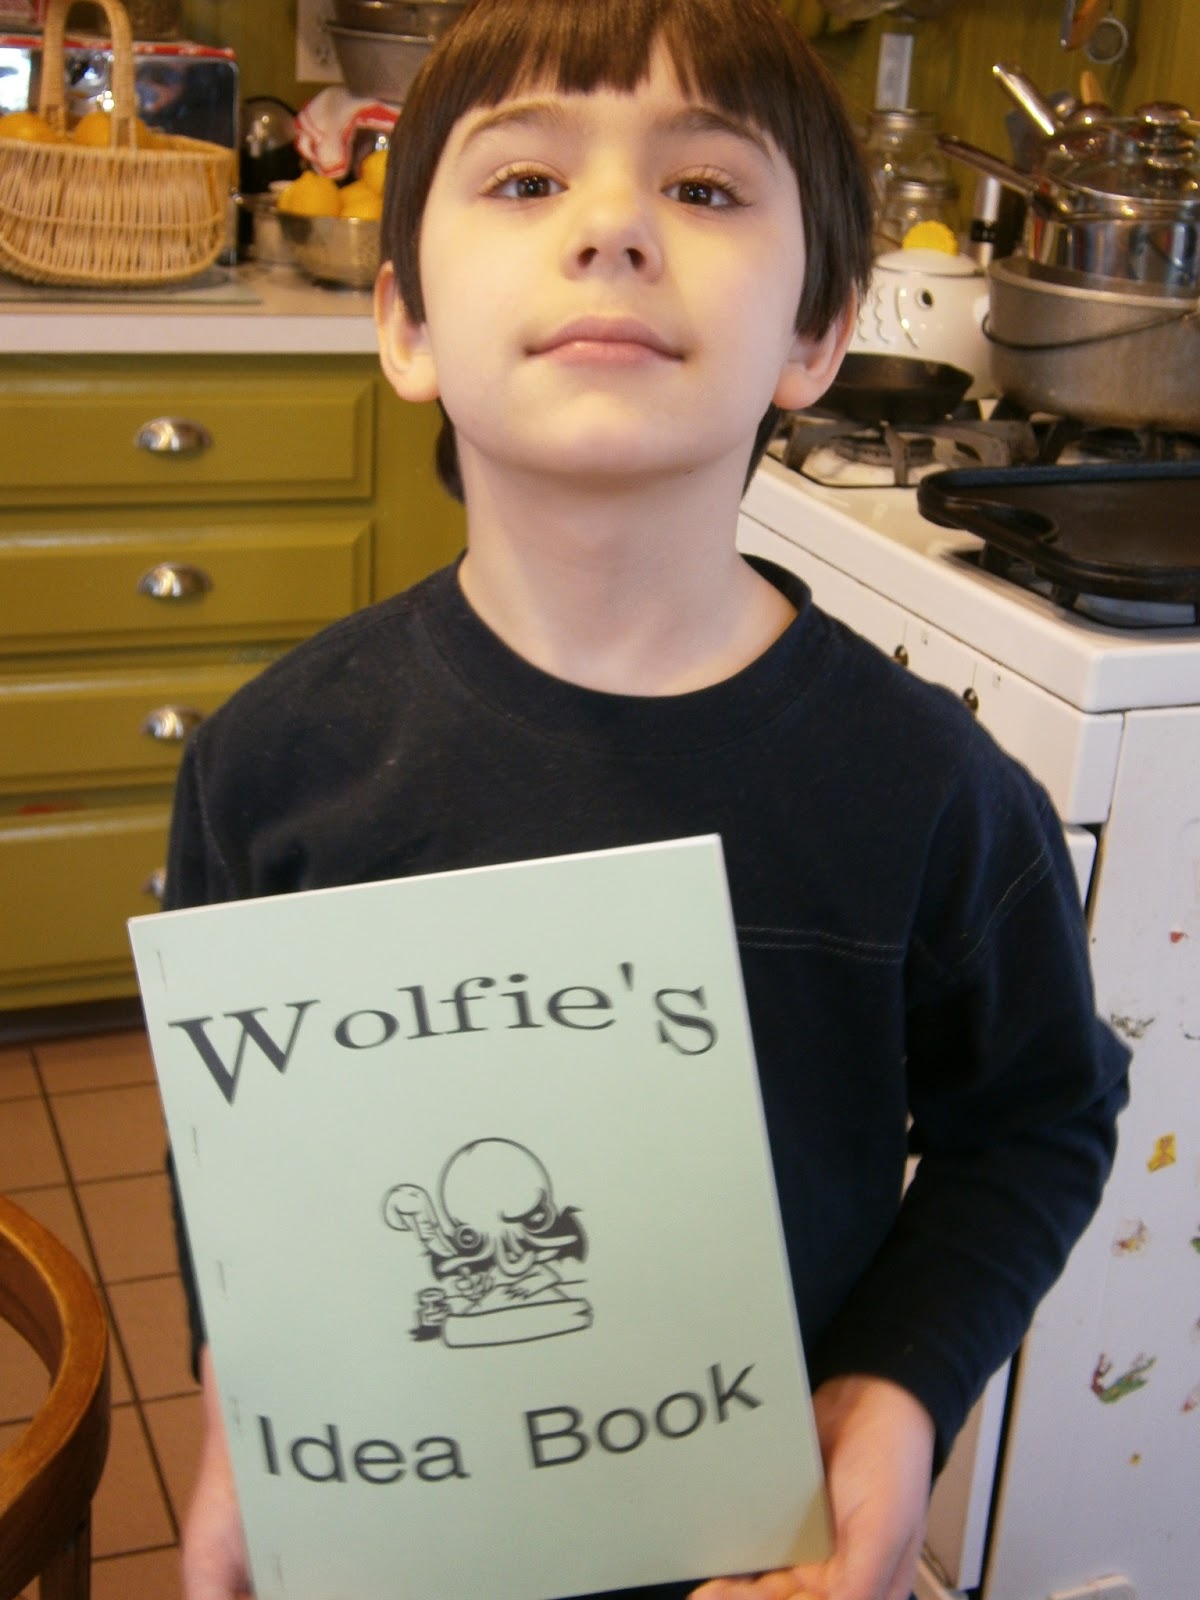
Fun Project---Idea Book!


This Easter we decided to make the boys a gift and wanted it to be really personal. So,  we came up with a book that was a coloring book/ finish-the-picture book with an emphasis on creative writing. This was very simple to make as we drew up the pages and then copied them for the second book. A simple card stock cover and a few staples and you are done. This is personalized for my boys but could easily be changed to reflect another child's interests. The boys like it and have been working in them. I am happy to have worked with my husband on a special treat for our kids ,  using things we had on hand. 


Here are the pages we made. I hope they will inspire you to make one for a child that is special to you.   :-) 


Friday, March 22, 2013

Quick Chocolate Cake (Incidentally Dairy-free, Egg-free and Whole Wheat!


About 12 years ago, a local bakery generously shared a recipe with me. It was for a chocolate cake that they occasionally made. I don't know where the recipe originated, but it was one of those super-quick-company-is-coming recipes that doesn't need much in the way of ingredients. Because of this, it just so happens to be vegan! This is dairy-free and egg-free.It called for white flour, but I have been using whole wheat flour only in it with excellent results.
I love to top this off by smearing a luscious layer of red raspberry jam, freezing it for about 15 minutes and then topping it with homemade vanilla butter cream frosting. To die for! I love the combo of flavors.
I love that this is a great way to use up the end of the morning's coffee pot, as I hate to waste food. I will say that my husband loathes coffee, and he can't taste it in this cake.The chocolate prevents the coffee flavor from coming through.
This is a wonderfully moist cake. I always just make it in my 8 inch pyrex pan, because it has a lid that I can cover it with, but the bakery made this as a freestanding cake and it held up well. Also, this doubles well.
I have a new whisk that I am completely infatuated with. I swear I look for reasons to use it! I don't need the mixer to whip this up (except if I make frosting), I just get out my trusty whisk. It is from Rada cutlery and is made in the USA. It cleans so easily and makes the best gravies, sauces and batters. It is all metal, so I hope it will last a lifetime.

Lastly, this cake is a fun science/math project for kids. First we did the old baking soda/vinegar experiment. Then we talked about how cakes rise and how you can use different methods to achieve that. We noted the reaction between the vinegar and baking soda even in the presence of the other ingredients. We used the light in the oven and peered through the glass, watching the introduction of heat cause the batter to change forms from liquid to solid. Of course, the measuring of the ingredients was a good way to show fractions and capacity. The whole process is a good way to teach kitchen hygiene and how to complete a project by cleaning up afterwards. We could make this for a neighbor and learn about good citizenship. So much to learn from a super simple chocolate cake! But the most important thing to learn is:

"CAKE = AWESOMENESS"


Simply Delicious Chocolate Cake
(Incidentally Dairy-free, Egg-free and Whole Wheat!)

1 ½ cups whole wheat flour
⅓ cup unsweetened cocoa powder
1 tsp. baking soda
½ tsp. salt
1 cup sugar
-------------------------------
½ cup vegetable oil
1 cup cold coffee
2 tsp. vanilla extract
2 Tbsp. vinegar

~Preheat oven to 375 degrees.
~ Mix Dry ingredients thoroughly (sift, whisk or stir with fork): flour, cocoa, soda, salt, sugar.
~In a 2 cup measuring cup (or bowl if you don’t have one), place wet ingredients except vinegar: oil, coffee, and vanilla.
~ Pour wet ingredients into dry and mix with fork or whisk.
~Add vinegar and quickly stir until it is incorporated. You will see white swirls from the vinegar/baking soda reaction.
~quickly pour into an ungreased 8 inch square or 9 inch round cake pan.
~Bake for 25-30 minutes until toothpick inserted into center comes out clean.
~ Cool and top with favorite frosting or topping. Enjoy!


So, treat yo self...to cake, and possibly a very nice whisk. You won't regret it!

Saturday, March 16, 2013

When life hands you lemons, make lemon vinegar!

We use a couple dozen lemons every week. That is a lot of lemon peels hanging around. I have already zested and dried them, used them to freshen my disposal, composted them and scrubbed my stainless steel sink with them (which is AMAZING!). Now I am also using them to make lemon vinegar for cleaning.
      I cannot express my love for this vinegar to you. I keep a squirt bottle of it mixed 50/50 with water in the kitchen and bathroom. This is a sparkle maker. Use it to clean counters, floors, appliances (inside and out), freshen glassware with water spots, clean windows, deodorize the air. What can't this do? um, give you cancer from a bunch of chemicals and phony fragrance that isn't even listed for you like with most cleaning products.


How To:
Get ready, this is hard (not) 

... you put the lemon rinds in a jar, cover with plain old vinegar and strain it off in 2 weeks. Easy-peasy, right? 

You then mix it 50/50 with water in a squirt bottle and try to stop wiping everything down that you own...cutting boards, that seal around your refrigerator, light switches, your toilet, your faucets (they will gleam if you dry them with a soft cloth), laundry stains, mirrors...and on and on.


A Week for Field Trips


(subscribers may need to click here to view video of awesome kids and stingrays) 


 First of all we visited the Aquarium with Grandma Jo for a little sting ray petting. They acted like a bunch of puppies (the rays and kids)! The boys really love rays and apparently Ollie does too!


A video of the kids and rays (subscribers may need to go to the blog to see) 
On Friday we went to a homeschool maple sugaring special at Rocky River Reservation. The naturalist did a great job and really kept up the kid's interest. They experienced sugaring from the viewpoint of Native Americans and pioneers,  popular current methods for sugaring and how it is done in large scale operations. Afterwards they sampled the syrup and had a piece of maple sugar candy.


Ew,  it looks like a tree colostomy bag.